
Next to the kitchen, your bathroom (or bathrooms) is likely the most utilized room in the home. It’s where we wash our face, brush our teeth, wash our hair, clean our bodies, and more. The sink faucet sees a lot of action both day and night which means all too often the faucet aerator can become clogged with unwanted sediment and minerals contained in the tap water.
But what exactly is a faucet aerator?
According to Aerator.com, bathroom faucet aerators are crucial but often an overlooked component of your bathroom’s plumbing system. Engineered to fit the very end of the faucet, the small device plays an extremely important role in conserving water while greatly enhancing your bathing experience. It’s designed to mix air with the tap water that comes from the faucet to create a steadier, more uniform stream. But on occasion, the stream is interrupted when the aerator becomes clogged. That’s when it needs to be cleaned.
But can you clean a bathroom faucet aerator on your own? The professionals say yes. A recent report by Plumbing Lab states that faucet aerators work to save both water and money on utility bills with “every turn of the faucet handle.” But it will need a good cleaning every now and then. Here’s how you can go about keeping your aerator in tip-top condition.
Cleaning Your Bathroom Faucet Aerator
The process is simple, but you need to pay attention to the steps.
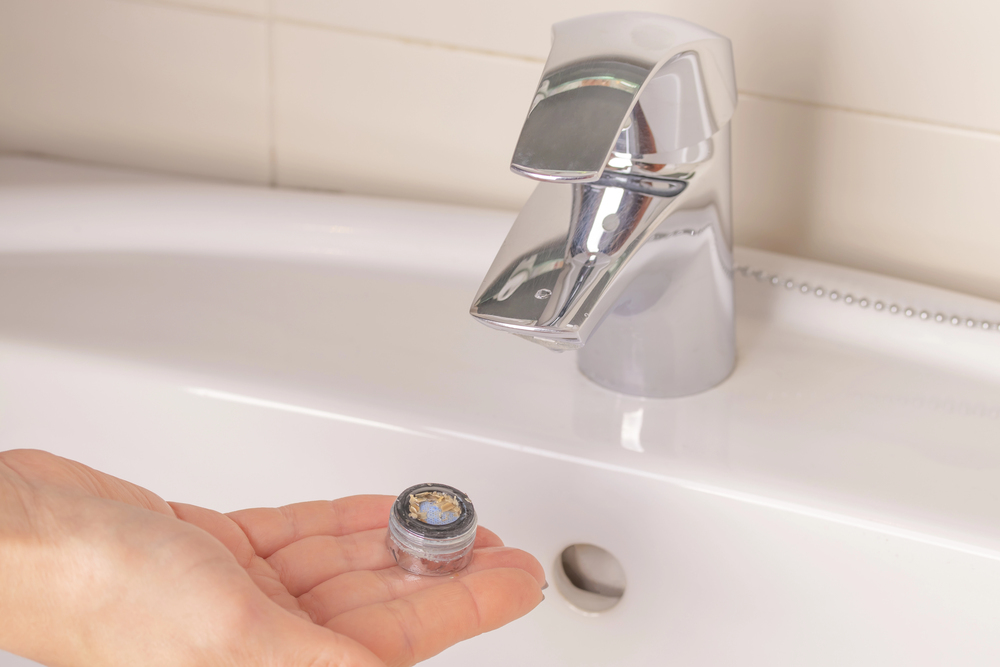
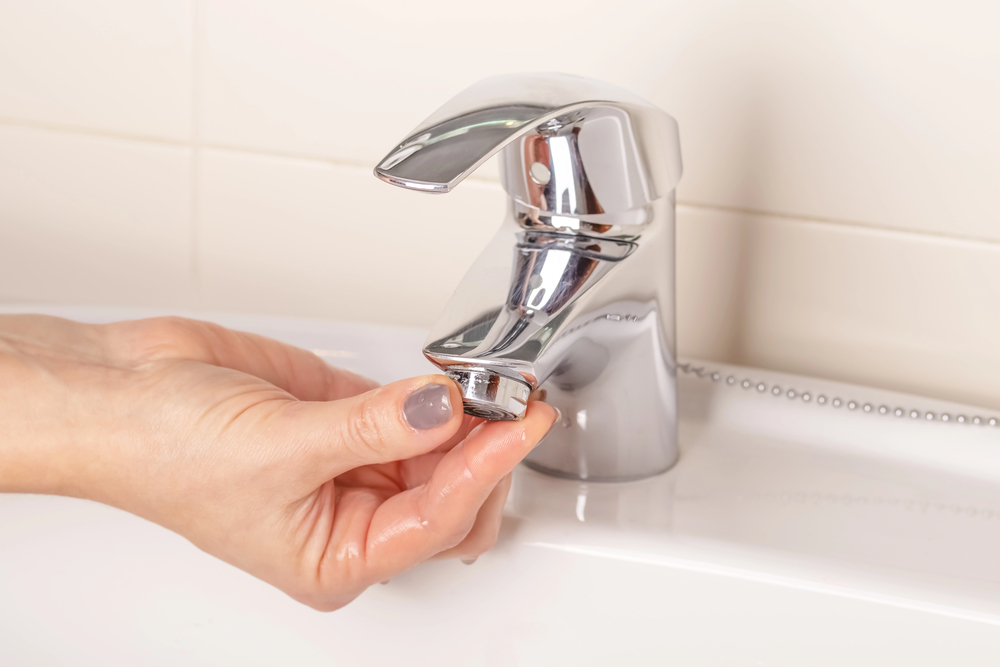
Step 1: Remove the Faucet Aerator
This is said to be an easy process. Just unthread the aerator from the tip of the faucet by turning it counterclockwise. You might need to use a pair of pliers or a wrench if it’s been screwed on too tight.
Some items you may need by your side once you remove the aerator include the following:
- Pliers or a wrench
- A paper towel or cloth
- Electrical tape
- Wine vinegar
- Toothpicks
- Penetrating oil
- Toothbrush
Step 2: Cleaning the Aerator Unit and the Faucet
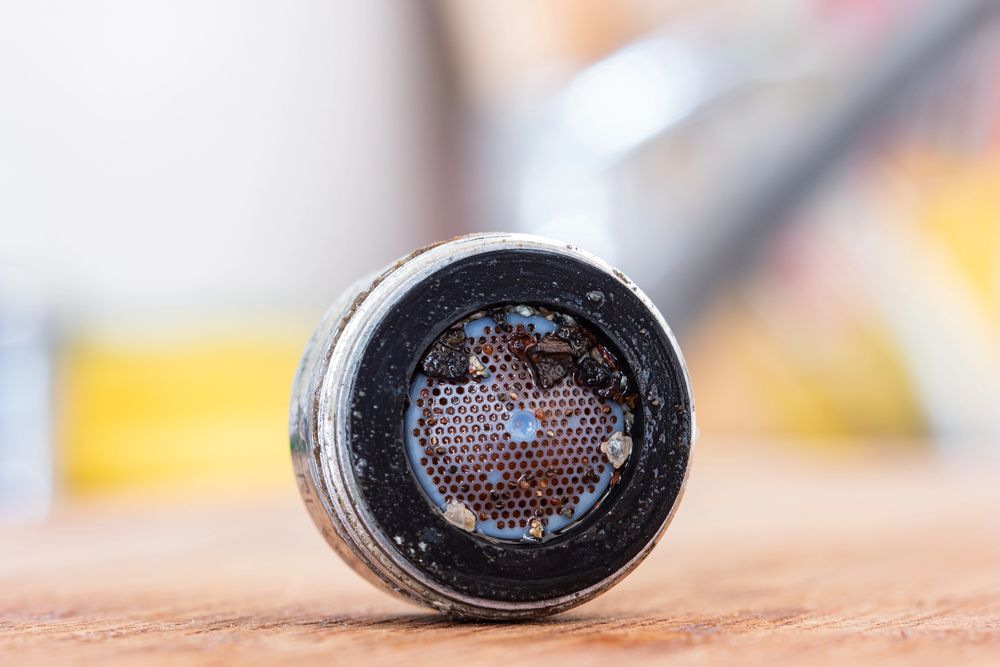
As soon as the aerator has been removed, you need to rinse it with warm water from the tap and scrub it with the toothbrush and soap to remove the loose dirt and debris. If you have hard mineral build-up on the aerator, you will need to soak it in the wine vinegar for upwards of two hours. Afterwards, pick at the screen with the toothpick or even a safety pin. This should help you remove any hard calcium that’s still stuck to the screen.
Be aware of all the components that your faucet aerator possesses, including:
- Flow restrictor
- Rubber washer
- Bushing
- Mixer
- Screen
- Outer housing
- Aerator body
It’s said that remembering the order in which the components are assembled is crucial during the reassembling phase of the cleaning process.
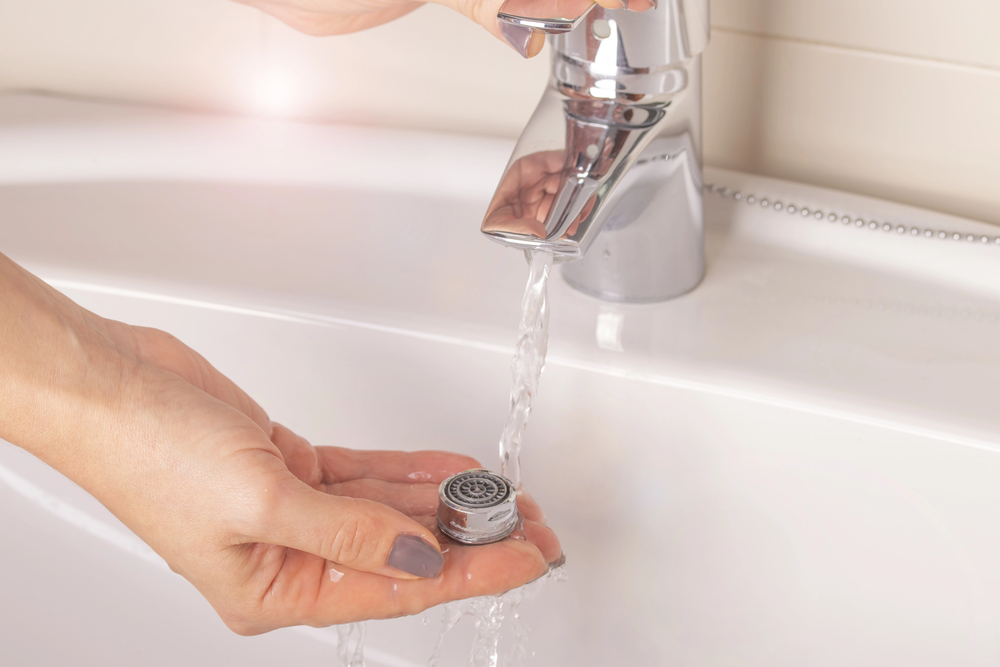
Step 3: Final Rinsing & and Aerator Reassembling
According to Plumbing Lab, once all the bathroom faucet aerator parts have been thoroughly cleaned, each part should be inspected prior to reassembly. Once you’re satisfied that everything is in good shape, it’s time to reassemble the aerator by simply reversing the disassembly process.
However, it’s important to keep in mind that the reassembly process will differ somewhat from brand to brand, including Kohler, Delta, and Moen. Still, it’s said that you should find the do-it-yourself (DIY) process easy no matter what brand bathroom faucet you are cleaning.
The Reason a Bathroom Faucet Aerator Gets Clogged
In conclusion, you might be wondering how an aerator gets clogged in the first place. It all begins with the device’s mesh covering or screen. The purpose of the aerator is to add air into your tap water stream. The screen shapes your water into many smaller streams. This is said to prevent splashing while greatly improving water pressure.
Blockages occur from the buildup of dirt, minerals, and debris in the water, which means regular cleaning of your faucet aerator is essential. This is especially true if you live in an area where the water is hard due to extra limescale and calcium.
While you should have no trouble taking on the cleaning your bathroom faucet aerator (and your kitchen faucet too) on a DIY basis, there are occasions where the device is screwed on so tightly that you cannot remove it even when using a wrench. Or you might lose a crucial component of your aerator which would require purchasing a new one.
In either case, it would be a prudent to hire a professional to either clean your existing faucet aerator or to install a brand new one. When it comes to your bathroom being fully functional, you want the job done right the first time.
Image Credit: depositphotos.com