
AD | Gifted / Affiliate
Last Friday saw schools up and down the country celebrating National Book Week by asking children to dress up as a character from a storybook. Roo’s school asked this of their school children, however in order to be eligible for the dress-up competition you had to have a handcrafted costume. Wanting to do something a little different Niamh’s mum (Roo’s best friends mum) suggested Thing 1 and Thing 2 from the Dr Seuss books. Fabulous idea!
We decided that the girls could wear black leggings and a long sleeve top with a red t-shirt sporting ‘Thing 1‘ or ‘Thing 2‘ along with blue wigs. I was put in charge of making the t-shirts and I was surprised at just how easy it was to make.
How To Make… Thing 1 and Thing 2 costume
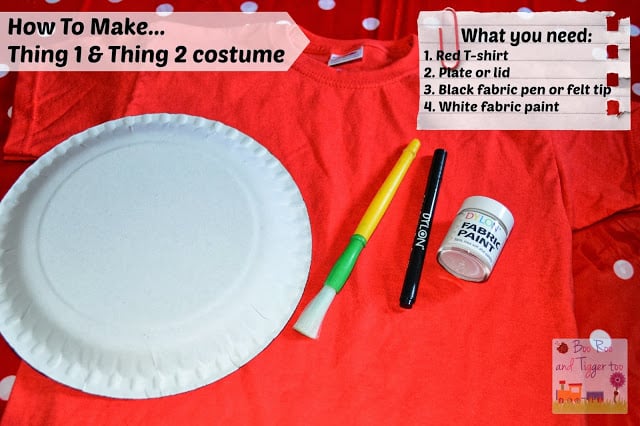
What you will need
- Red T-shirt (x2 one for each ‘Thing’)
- Plate or lid to draw around
- Black fabric pen or felt tip pen
- White fabric paint
- You will also need your iron to seal the fabric paint.

Step One
- Place the plate or lid in the centre of the t-shirt, as I had different sized t-shirts I decided to leave the same sized gap between the neckline and the top of the circle.
- Carefully draw around the plate or lid using the fabric or felt tip pen, you might find it easier to do this in short strokes so that the fabric does not crumple as you draw across the fibres.

Step Two
- Carefully fill in the circle using the white fabric paint (shake the fabric paint pot before use), don’t worry about going right up to the black pen line as you will be able to tidy up the edging later.
- If adding a second layer of paint ensure that the first layer is dry and has been heat sealed using a hot iron, also heat seal the second coat.

Step Three
Using the black fabric or felt tip pen carefully outline the circle, you want to make the outline 5mm think so that it can be seen when you stand away from the t-shirt.

Step Four
- Add ‘Thing’ along the top curve of the circle using the black fabric or felt tip pen
- Add the corresponding ‘1’ or ‘2’ underneath, including the relevant flick marks along the lower half of the curve.

Step five
Finally, add two cheeky children wearing black leggings and long-sleeved tops (not required in the warmer weather) and blue wigs.
YOu could try Heat Transfer Patches
After completing these steps, there is one more step that will make your clothing even more outstanding if you are so inclined. You can decorate your clothing with Heat Transfer Patches. These are not ordinary patches; they are carefully designed and crafted to bring some of the characters of books directly to your clothing.
Putting these patches on your clothing is more than just a fashion statement; it is a way to publicly display your passion for words and become a moving advertisement for the magic contained in the pages of books. It connects you with other classmates who share the same love for Thing 1 and Thing 2 and resonates with them.

Frequently Asked Questions (FAQs) on creating a Thing 1 and Thing 2 Costume
1. Can I wash the Thing 1 and Thing 2 t-shirts after making them?
Yes, as long as you have used fabric paint or fabric pens and have “heat-sealed” the design. To heat-seal, once the paint is completely dry, iron the t-shirt on the reverse side or place a piece of greaseproof paper over the design and iron on a hot setting for several minutes. Always check the instructions on your specific fabric paint bottle.
2. What if I don’t have blue wigs? Is there an alternative?
If you can’t get hold of blue wigs, blue hair spray or temporary hair chalk is a great alternative! Another creative idea is to make a “hair” headband using blue tinsel, blue feathers, or even strips of blue felt attached to a standard hair hoop.
3. I’m not very confident at drawing—can I use a template?
Absolutely! If you’re worried about free-handing the “Thing” logo, you can print out a template from the internet, cut it out, and use it as a stencil. Alternatively, you can use a pencil to lightly sketch the circle and text first before committing with the permanent fabric pen.
4. How do I prevent the fabric paint from bleeding through to the back of the shirt?
The best way to prevent bleeding is to place a piece of cardboard or a thick magazine inside the t-shirt before you start painting. This keeps the front and back of the shirt separated and provides a nice flat surface to work on.
5. What should I do if the white paint isn’t bright enough on the red t-shirt?
Red fabric can sometimes “soak up” white paint, making it look a bit pink. To avoid this, apply a thin first layer, let it dry (and heat-seal it), then apply a second coat. This “layering” technique will give you a much brighter, more professional-looking white circle.
6. Can I make this costume without using fabric paint?
Yes! If you’re in a real hurry, you can cut a circle out of white felt and use a black marker to write the text on it. You can then either sew the felt circle onto the red t-shirt or use fabric glue for a “no-sew” version.
Disclosure: I received a selection of Dylon Fabric paints/pens FOC in order to assist my book week costume making.
